

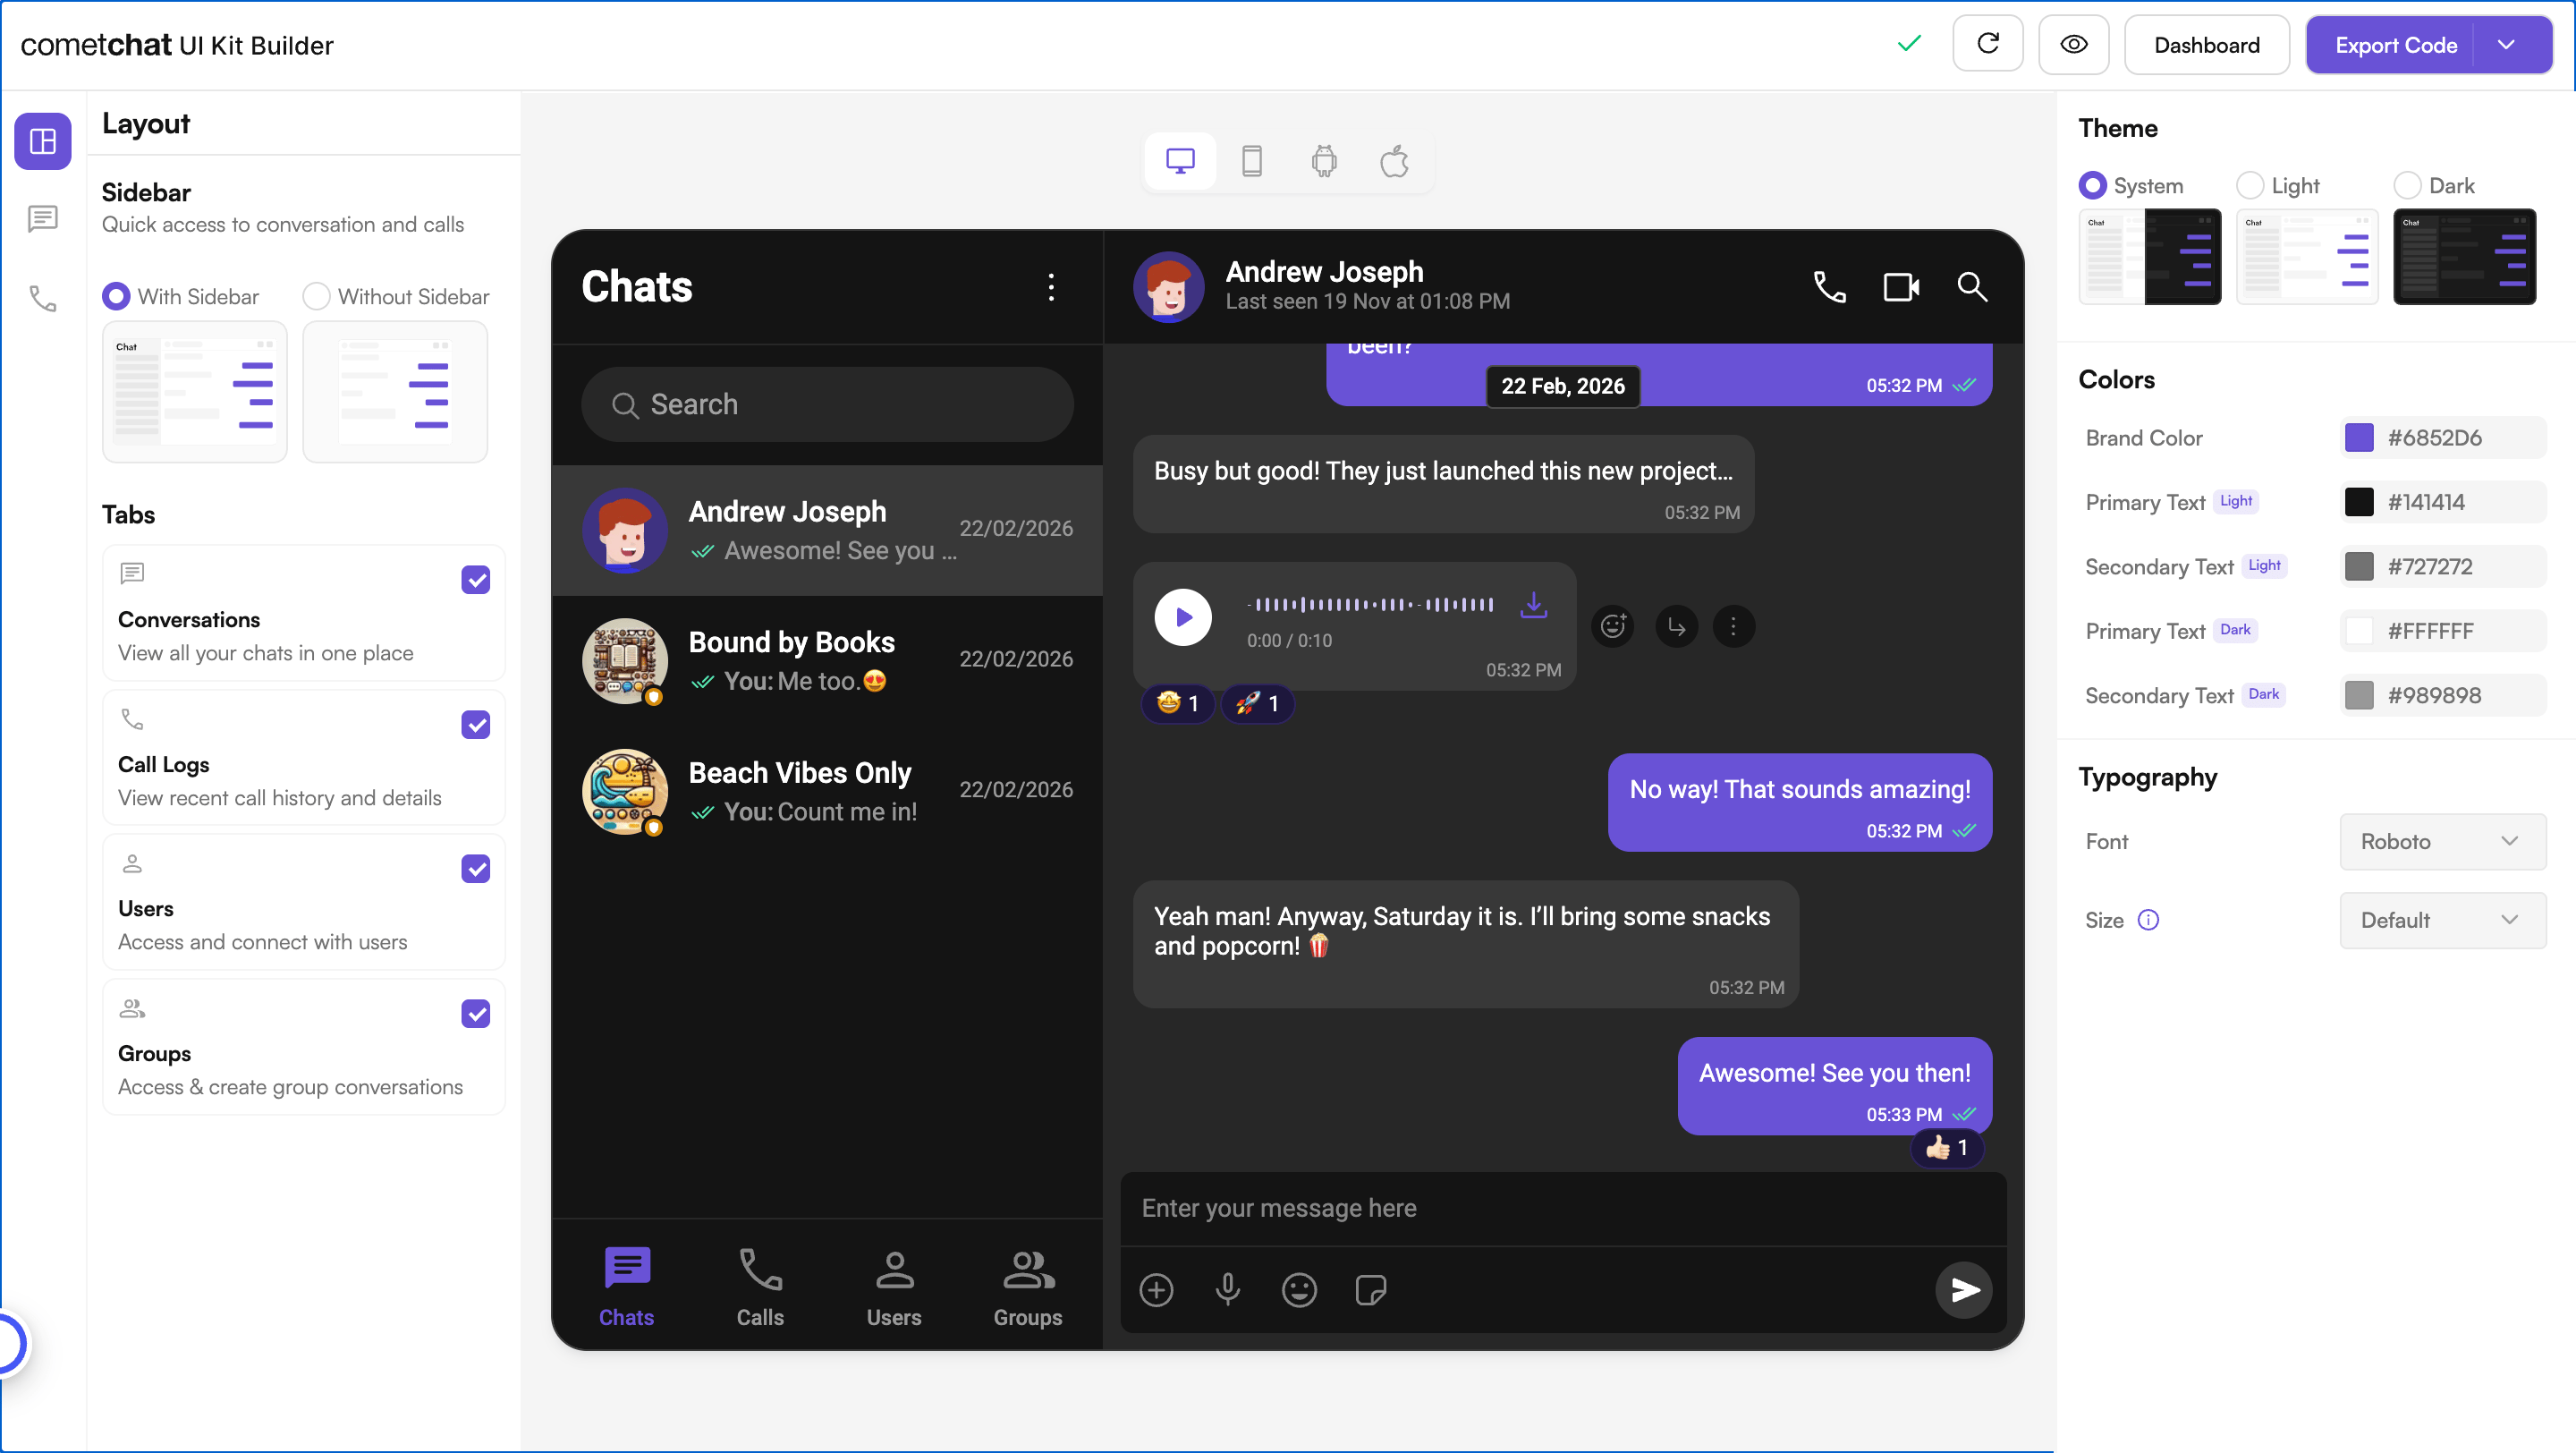
Complete Integration Workflow
- Design Your Chat Experience - Use the UI Kit Builder to customize layouts, features, and styling.
- Export Your Code - Once satisfied, download the generated code package.
- Enable Features - Enable additional features in the CometChat Dashboard if required.
- Preview Customizations - Optionally, preview the chat experience before integrating it into your project.
- Integration - Integrate into your existing application.
- Customize Further - Explore advanced customization options to tailor the chat experience.
Launch the UI Kit Builder
- Log in to your CometChat Dashboard.
- Select your application from the list.
- Navigate to Integrate > React > Launch UI Kit Builder.
Enable Features in CometChat Dashboard
If your app requires any of the following features, make sure to enable them from the CometChat Dashboard- Stickers – Allow users to send expressive stickers.
- Polls – Enable in-chat polls for user engagement.
- Collaborative Whiteboard – Let users draw and collaborate in real time.
- Collaborative Document – Allow multiple users to edit documents together.
- Message Translation – Translate messages between different languages.
- AI User Copilot
- Conversation Starter – Suggests conversation openers.
- Conversation Summary – Generates AI-powered chat summaries.
- Smart Reply – Provides quick reply suggestions.
How to Enable These Features?
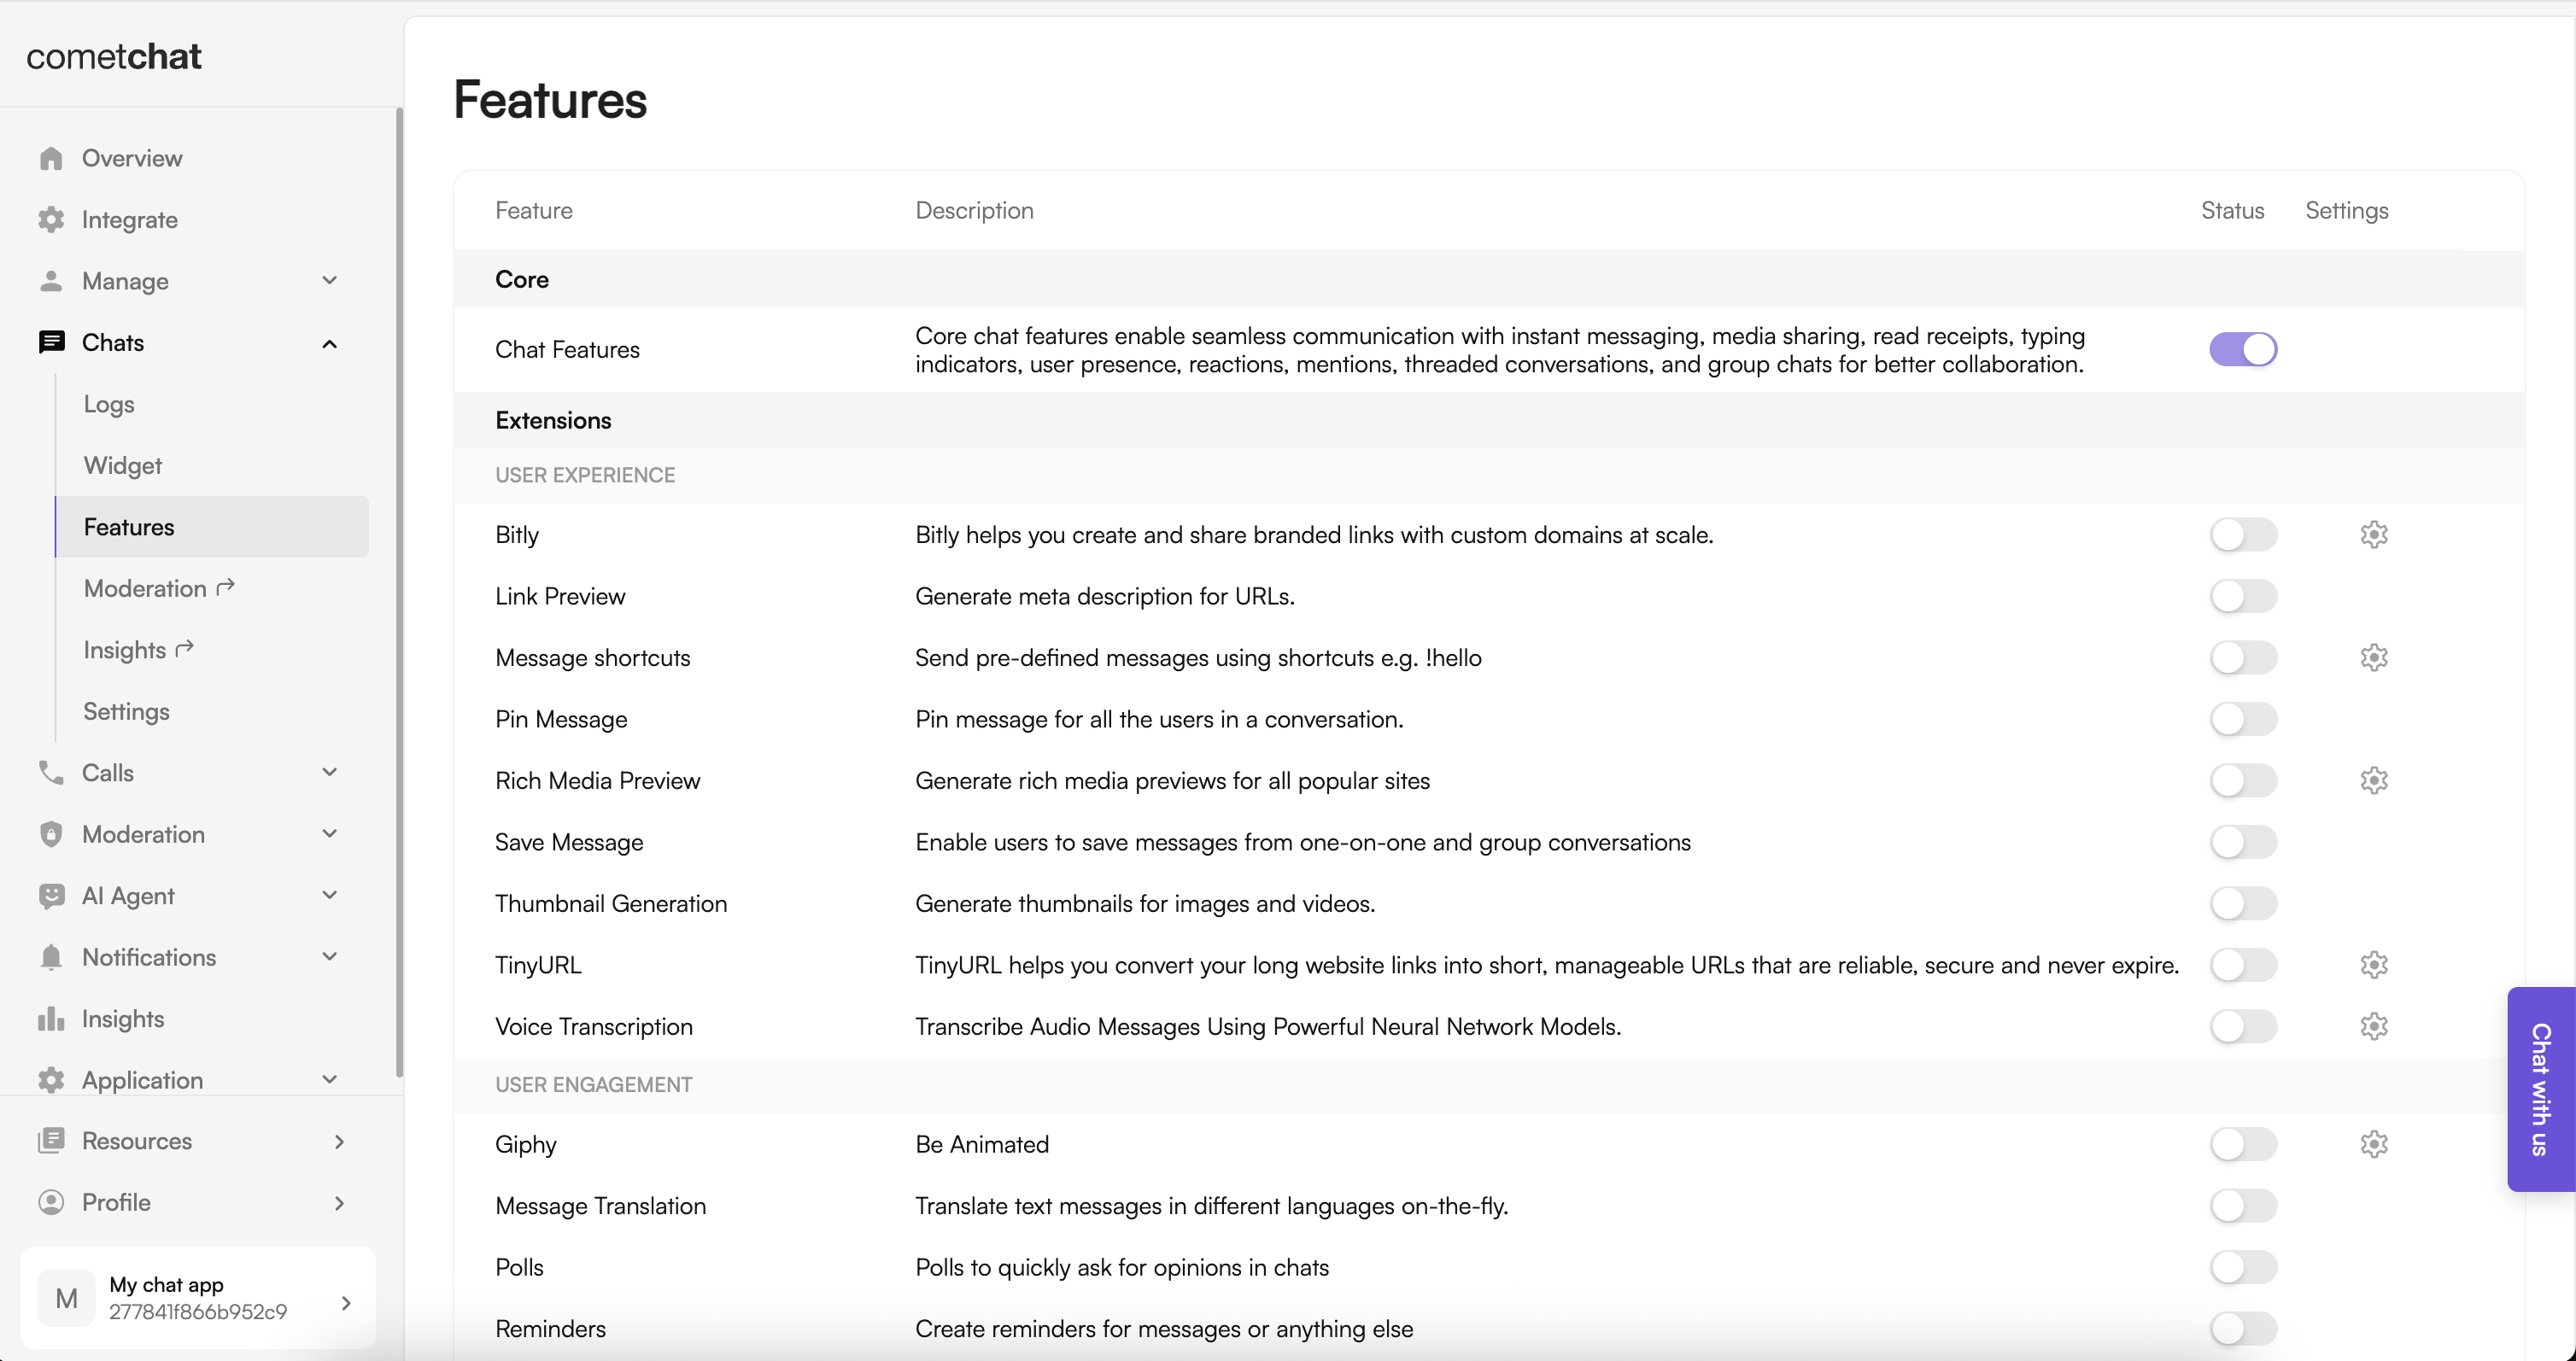
- Log in to your CometChat Dashboard
- Select your application.
- Navigate to Chat > Features.
- Toggle ON the required features.
- Click Save Changes.
Preview Customizations (Optional)
Before integrating the UI Kit Builder into your project, you can preview the chat experience by following these steps. This step is completely optional and can be skipped if you want to directly integrate the UI Kit Builder into your project.You can preview the experience:
- Open the
cometchat-app-reactfolder.- Add credentials for your app in
src/index.tsx:
- Install dependencies:
- Run the app:
Integration with CometChat UI Kit Builder (React Router)
Step 1: Install Dependencies
Step 2: Copy CometChat Folder
Copy thecometchat-app-react/src/CometChat folder inside your src/app directory.
Step 3: Create & Initialize CometChatNoSSR.tsx
Directory Structure:
src/app/CometChatNoSSR/CometChatNoSSR.tsx
Step 4: User Login
To authenticate a user, you need aUID. You can either:
- Create new users on the CometChat Dashboard, CometChat SDK Method or via the API.
-
Use pre-generated test users:
cometchat-uid-1cometchat-uid-2cometchat-uid-3cometchat-uid-4cometchat-uid-5
Security Best Practices
- The Auth Key method is recommended for proof-of-concept (POC) development and early-stage testing.
- For production environments, it is strongly advised to use an Auth Token instead of an Auth Key to enhance security and prevent unauthorized access.
- TypeScript
- Build the CometChat UIKit settings using your App ID, Region, and Auth Key.
- Initialize CometChatUIKit with those settings and set up localization.
- Check if a user is already logged in; if not, perform a login with a hard-coded UID (replace “UID” with your actual user ID).
- TypeScript
Step 5: Disable SSR and Render the CometChat Component
Create a file CometChat.tsx inside the routes folder:Why disable SSR? CometChat UI Kit Builder relies on browser APIs such as window, document, and WebSockets. Since React Router renders on the server by default, disabling SSR for this component prevents runtime errors.
Render with Default User and Group
You can also render the component with default user and group selection:- User Chats (
chatType = "user"): Displays one-on-one chats only, either for a currently selected user or the default user. - Group Chats (
chatType = "group"): Displays group chats exclusively, either for a currently selected group or the default group.
Step 6: Run Your Application
-
Start the development server
- Verify the chat interface
- In your browser, navigate to the
/chatroute(e.g., http://localhost:3000/chat). - Confirm that the chat experience loads as expected.
Additional Configuration Notes
Ensure the following features are also turned on in your app > Chat > Features for full functionality:- Message translation
- Polls
- Stickers
- Collaborative whiteboard
- Collaborative document
- Conversation starter
- Conversation summary
- Smart reply
tsConfig.json:
Understanding Your Generated Code
The exported package includes several important elements to help you further customize your chat experience:Directory Structure
TheCometChat folder contains:
- Components - Individual UI elements (message bubbles, input fields, etc.)
- Layouts - Pre-configured arrangement of components
- Context - State management for your chat application
- Hooks - Custom React hooks for chat functionality
- Utils - Helper functions and configuration
Configuration Files
- CometChat Settings File - Controls the appearance and behavior of your chat UI
- Theme Configuration - Customize colors, typography, and spacing
- Localization Files - Add support for different languages
Next Steps
Now that you’ve set up your chat experience, explore further configuration options:- Builder Configuration File – Learn how to customize your integration.
- Builder Directory Structure – Understand the organization of the builder components.
- Advanced Theming – Modify themes and UI elements to match your brand.
- Additional Customizations – Customise the UI the way you want.