

Overview
A MessageTemplate provides you with the capability to define and customize both the structure and the behavior of the MessageBubble. It acts as a schema or design blueprint for creating a variety of message bubble components, allowing you to manage their appearance and interactions within your application effectively and consistently.Structure
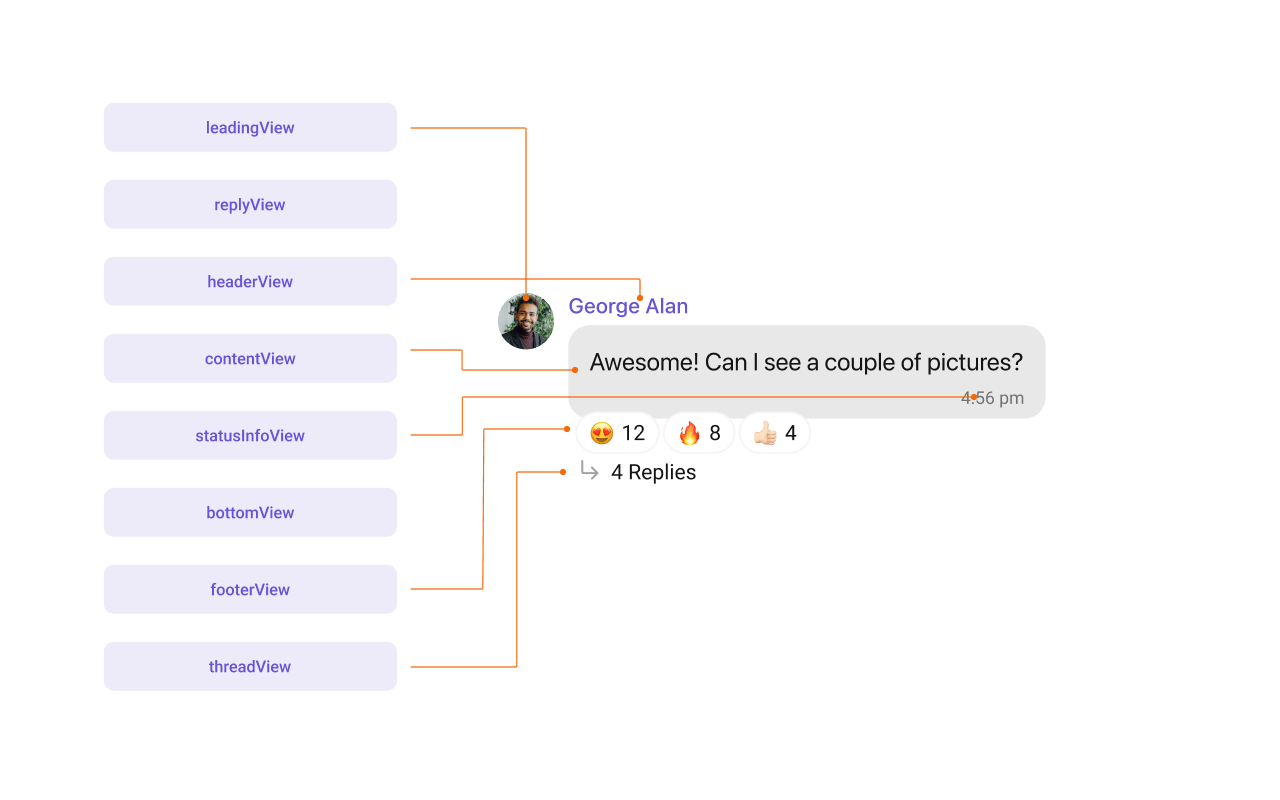
- Leading view: This is where the sender’s avatar is displayed. It’s typically on the left of the MessageBubble for messages from others and on the right for messages from the current user.
- Header view: This displays the sender’s name and is especially useful in group chats where multiple users are sending messages.
- Reply view: This view can be used to extend the MessageBubble with additional elements. It’s typically placed above the Content view.
- Content view: This is the core of the MessageBubble where the message content (text, images, videos, etc.) is displayed.
- Bottom view: This view can be used to extend the MessageBubble with additional elements, such as link previews or a ‘load more’ button for long messages. It’s typically placed beneath the Content view.
- Thread view: This is where the thread reply icon and reply counts are displayed. It’s located below the footer view.
- Footer view: This is where the timestamp of the message and its delivery or read status are displayed. It’s located at the bottom of the MessageBubble.
- Status Info view: This is where the timestamp of the message and its delivery or read status are displayed. It’s located inside the MessageBubble just below the content view.
Properties
MessageTemplate provides you with methods that allow you to alter various properties of the MessageBubble. These properties include aspects such as thetype and category of a message, the appearance and behavior of the header, content, and footer sections of the message bubble.
1. Type
UsingsetType() you can set the type of CometChatMessage. This will map your MessageTemplate to the corresponding CometChatMessage. You can set the MessageTemplate’s Type using the following code snippet:
2. Category
Using.setCategory() you can set the category of a MessageTemplate. This will create a MessageTemplate with the specified category and link it with a CometChatMessage of the same category.
Please refer to our guide on Message Categories for a deeper understanding of message categories.
3. Header View
Thetemplate.headerView method allows you to assign a custom header view to the MessageBubble. By default, it is configured to display the sender’s name.
4. Content View
Thetemplate.contentView method allows you to assign a custom content view to the MessageBubble. By default, it displays the Text Bubble, Image Bubble, File Bubble, Audio Bubble, or Video Bubble, depending on the message type.
5. Footer View
Thetemplate.footerView method allows you to assign a custom Footer view to the MessageBubble. By default, it displays the receipt and timestamp.
6. Bottom View
Thetemplate.bottomView method allows you to assign a custom Bottom view to the MessageBubble. By default, it has buttons such as link previews or a ‘load more’ button for long messages.
7. Bubble View
Thetemplate.bubbleView method allows you to assign a custom Bubble view to the MessageBubble. By default, headerView, contentView, and footerView together form a message bubble.
8. Options
Thetemplate.options lets you set the list of actions that a user can perform on a message. This includes actions like reacting to, editing, or deleting a message.
Customization
Let’s dive into how you can use the properties of MessageTemplate to customize an existing template or add a new one to the MessageList component. The first step is to fetch the list of existing templates when you want to modify or add to them. This can be done using thegetAllMessageTemplates() method from the DataSource of the CometChatUIKit class:
Existing Templates
You will need to first get the MessageTemplates object for the type of message you want to customize. In this example, we’ll customize the TextMessage Bubble. The code snippet to get the Text MessageTemplate is as follows:- Swift
CometChatMessageBubble Component for this example. To apply Template to Messages, you will have to use the MessageList component.
By utilizing this code snippet, you will retrieve text templates:
- Swift
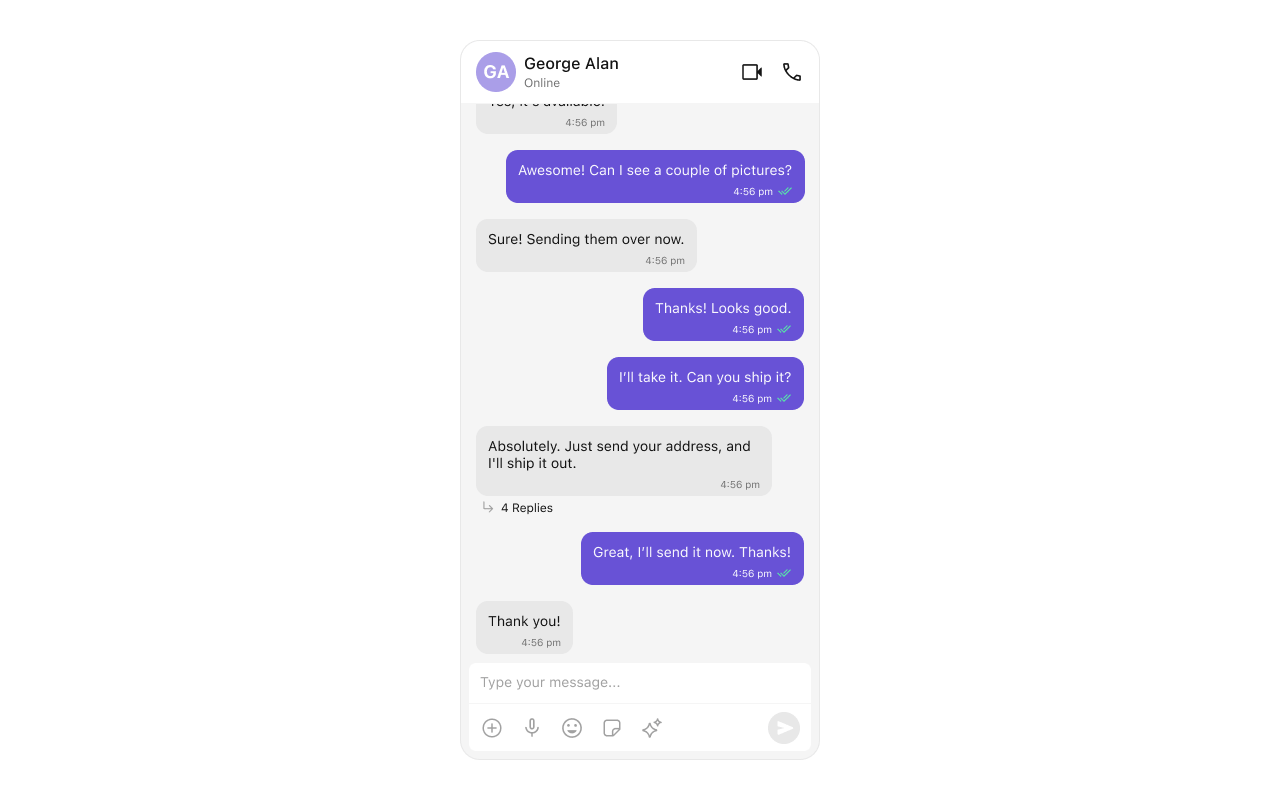
Ensure to pass and present
cometChatMessages. If a navigation controller is already in use, utilize the pushViewController function instead of directly presenting the view controller.Header View
Thetemplate.headerView method of MessageTemplate allows you to add custom views to the header of your message bubbles. In the example below, we will add a custom UIView custom_header_view to the header view of every text message in the MessageList.

- custom_header_view
- Swift
Ensure to pass and present
cometChatMessages. If a navigation controller is already in use, utilize the pushViewController function instead of directly presenting the view controller.Content View
Thetemplate.contentView method of MessageTemplate allows you to add a custom view to the content of your message bubbles. In the example below, we will add a custom custom_message_view_file to the content view of every text message in the MessageList.
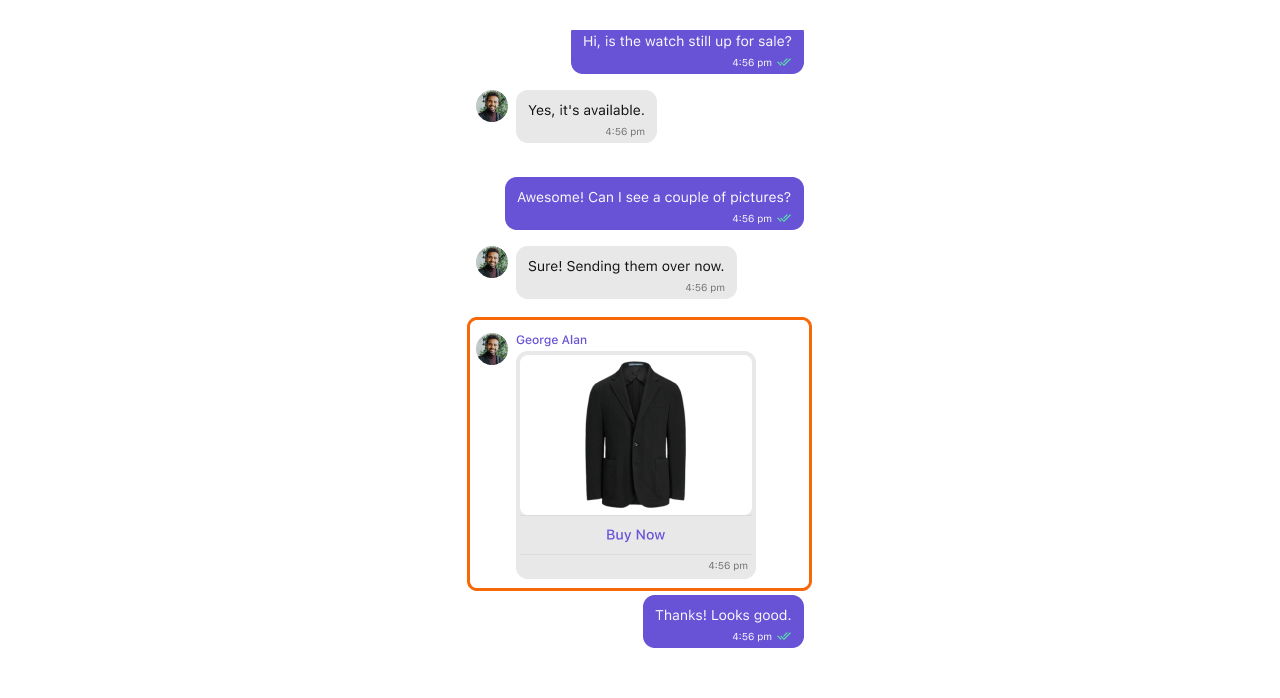
- custom_message_view_file
- Swift
Ensure to pass and present
cometChatMessages. If a navigation controller is already in use, utilize the pushViewController function instead of directly presenting the view controller.Bottom View
Thetemplate.bottomView method of MessageTemplate allows you to add a custom button view to your message bubbles. In the example below, we will add a custom UIView custom_bottom_view_file to the bottom view of every text message in the MessageList.

- custom_bottom_view_file
- Swift
Ensure to pass and present
cometChatMessages. If a navigation controller is already in use, utilize the pushViewController function instead of directly presenting the view controller.Footer View
Thetemplate.footerView method of MessageTemplate allows you to add a footer view to your message bubbles. In the example below, we will add a custom UIView file custom_footer_view to the bottom view of every text message in the MessageList.

- Swift
Ensure to pass and present
cometChatMessages. If a navigation controller is already in use, utilize the pushViewController function instead of directly presenting the view controller.Bubble View
Thetemplate.bubbleView method of MessageTemplate allows you to add a bubble view to your message bubbles. In the example below, we will add a custom UIView custom_bubble_view to the bubble view of every text message in the MessageList.

- custom_bubble_view
- Swift
Ensure to pass and present
cometChatMessages. If a navigation controller is already in use, utilize the pushViewController function instead of directly presenting the view controller.Options List
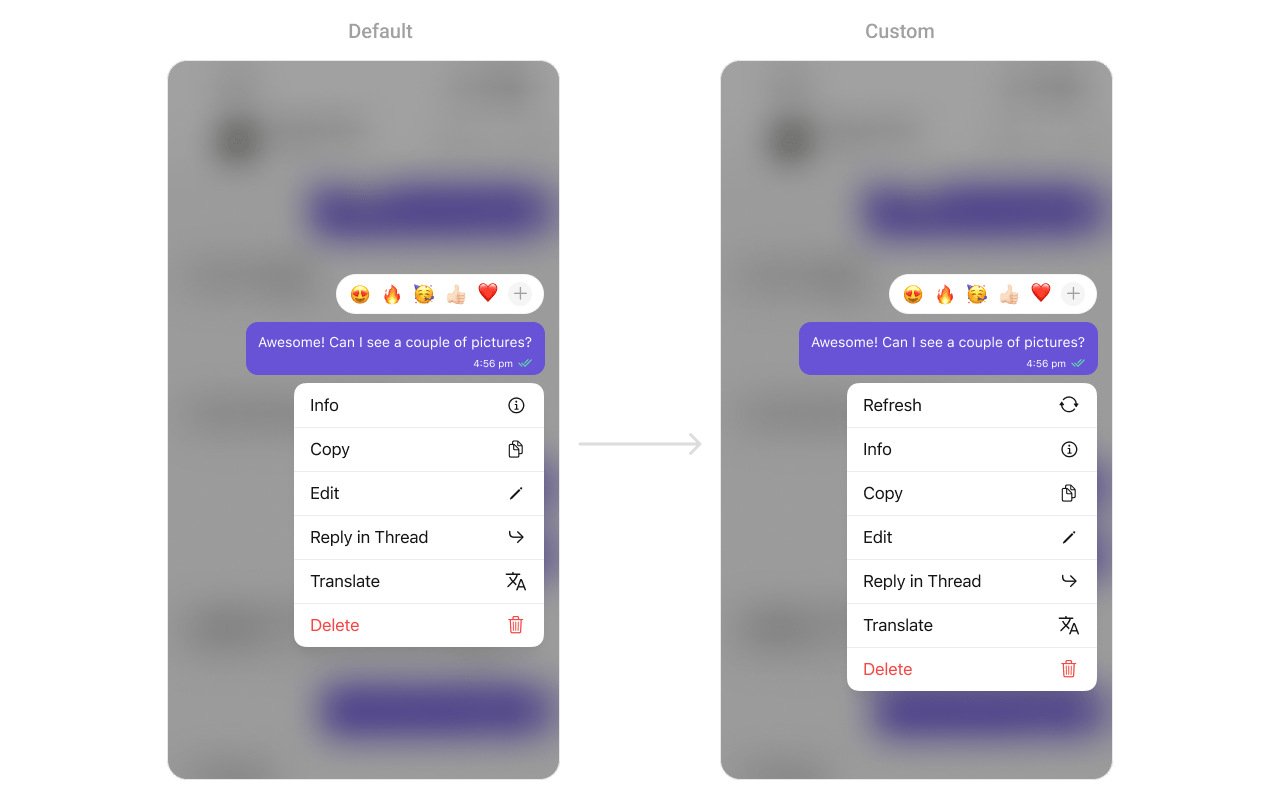
Thetemplate.options method in the MessageTemplate allows you to customize the options that appear in the action sheet when a message is long-pressed. By default, CometChat UIKit provides a set of options like “Edit”, “Share”, “Translated message”, and “Delete”.
However, if you wish to override or modify these options, you can use the template.options method and pass a list of getMessageOptions. This list of options will replace the default set.
- Swift
Ensure to pass and present
cometChatMessages. If a navigation controller is already in use, utilize the pushViewController function instead of directly presenting the view controller.Status Info View
Thetemplate.statusInfoView method of MessageTemplate enables you to add a status info view to your message bubbles. This is a user-defined component used to display the statusInfo view, which shows the timestamp and read-receipt of the message.
In the example below, we will integrate a custom UIView file named custom_status_view into the status info view of every text message in the MessageList.

- custom_status_view
- Swift
Ensure to pass and present
cometChatMessages. If a navigation controller is already in use, utilize the pushViewController function instead of directly presenting the view controller.New Template
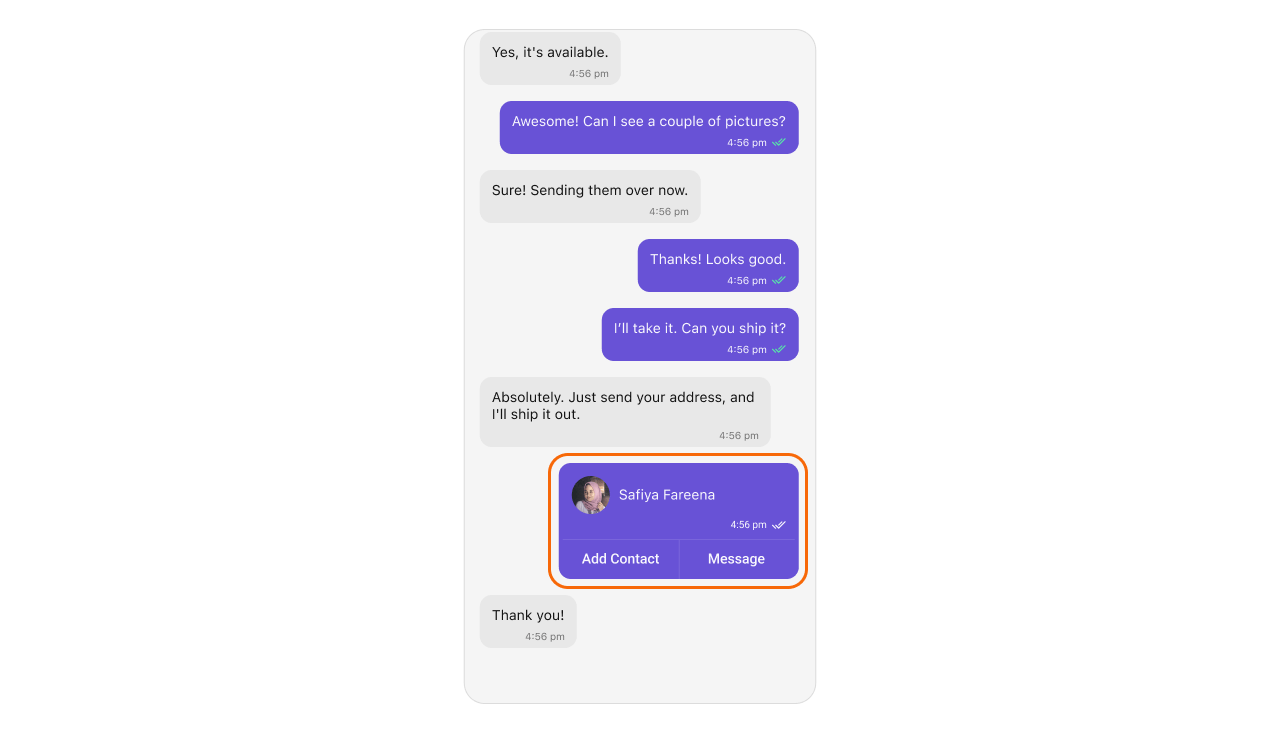
Creating an entirely new template for custom messages is one of the powerful features of CometChat’s MessageTemplate. To add a new template, you can create a new one and then add it to the list of existing templates. First, let’s see how to send a custom message:- Swift
- Swift
Make sure to set new type and category in the message Request builder in order to fetch those respective messages as shown in the example above.
Next Steps
- Message List — Display and customize the message list
- Message Bubble Styling — Customize message bubble appearance
- Message Composer — Customize the message input component